This article covers setting up your shipping services and the applicable associated items. Shipping setup in your Director account requires creating Service Providers, Carriers, Zones and Shipping Services as well as associating them to your inventory location(s). You will need access to certain areas in the Setup module as described below. If you do not have access to these areas you will need to contact the person at your company that is the administrator for your Director account to grant you access.
Service Providers: You must first set up a service provider so that you can attach that to the Shipping Carrier. While your solution offers various service providers, for the purpose of this article you will deal with only two types, in many cases, only one type. You will typically use UPS and/or FedEx which are Shipment Processors. You may use Shipping Fulfillment providers as well. Shipping Fulfillment providers are used when you work with a 3rd party fulfillment house and they require a file format other than those that are standard for UPS and FedEx. *The steps are high level and if you have questions please reach out to support for assistance.
- Go to the Setup Module >> Service Providers tab
- From the Services you have not subscribed to area select the appropriate provider and click the Subscribe... link

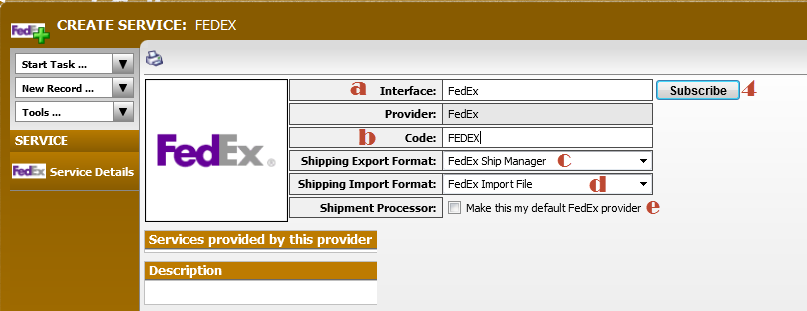
- Complete the fields provided
a. Interface - Typically leaving this as it is populated is fine. If you like you can modify it. If you are using a ThirdPartyCarrier provider you will likely want to modify this so that you can easily identify it.
b. Code - This is used for internal database purposes and must be unique across service providers. We recommend that you don't uses spaces or special characters.
c. Shipping Export Format - Select from the options provided.
d. Shipping Import Format - Select from the options provided.
e. Shipment Processor - Check this if this will be your default provider of this type (for FedEx & UPS this will typically be the case) - Click the Subscribe button
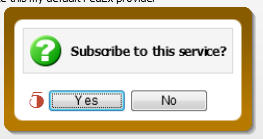
- Click the Yes button on the prompt
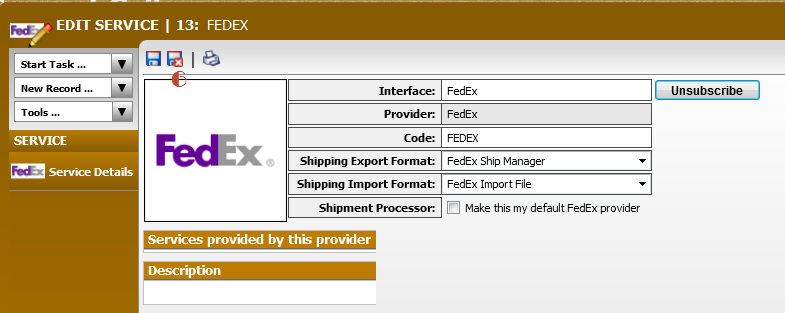
- The screen will refresh. Click the Save and Close icon.
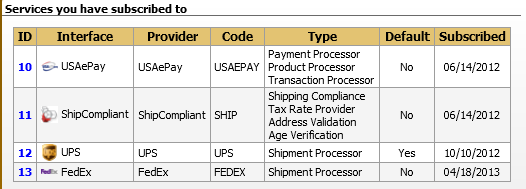
- The newly added provider will now show in the Services you have subscribed to area.
Navigating to Shipping Carriers, Shipping Zones and Shipping Services

Shipping Carriers: Standard carriers are UPS, FedEx, and USPS. You may also choose to create a 3rd party carrier (such as Bob's Shipping). Think of a carrier as any provider who has their own unique set of rate tables for their shipping services. In some circumstances, you may have a carrier who charges different rates for the same services under certain circumstances. For example, Bob's Shipping may have one set of Ground/2Day/Overnight rates for “Club” shipments and another set of rates for “Daily Web/Phone” shipments. If this is true for your carrier, you may want to reach out to our support team for additional direction on how to approach this set up.
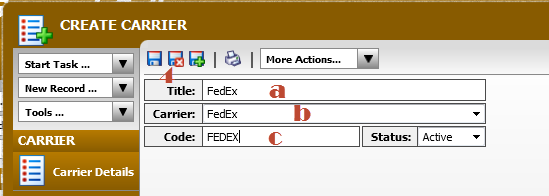
- To create your carrier, go to the Setup Module >> Settings Tab >> Click on the Shipping Carriers link
- Click the New button to add a Carrier

- Complete the fields provided.
a. Title - Enter the title of the carrier, this is typically the full or abbreviated carrier name.
b. Carrier - Select from the drop down. If the carrier you need isn't present you may need to create a new shipping service provider as described above.
c. Code - This is used for internal database purposes and must be unique across shipping carriers. We recommend that you don't uses spaces or special characters. - Click the Save & Close icon.
Shipping Zones: Once you have setup your carriers, you need to define what countries, states or zip codes each carrier will ship to. For example, UPS ships domestically to 8 continental zones and Alaska/Hawaii metro and rural. In the case of UPS, the zones are setup by zip code and the zip codes in each zone are unique to your business location/shipping origination address. You will need to consult the carrier’s web site to determine which zip codes fall into which regions OR you can setup your zones by state (see next section) by determining roughly which zone most of a state’s zip codes fall into. For example: from Washington State, California zip codes fall roughly into Zone 4 (North CA, 5 (Central CA) or 6 (South CA). You could choose to build 1 zone for each of the 3 areas of California and put the appropriate zip codes into it – or put the whole state into a single Zone (likely Zone 6, which will be the most expensive to ship to from WA). Different carriers typically have different zones and you may want to standardize and use the same zones for all carriers or set the zones up according to the different carrier designations.
Shipping Zones by Zip
- To create your Shipping Zone, go to the Setup Module >> Settings Tab >> Click on the Shipping Zones link
- Click the New button to add a Zone
- For Zones by Zip: TIP! Go to your carrier website and download a Zone Chart for you zip code. You can use this to build zip code based tables.
- Complete the provided fields
a. Name - For example Woodinville, if the rate applies just to a certain city. If you have multiple carriers and want different rates for them we recommend using the carrier title in the Name, such as UPS Zone 2, FedEx Zone 2 etc
b. Region Type - Select Zone by Zip Code - Click the Add button to enter the first set of zip code ranges
a. Title - Use a unique title
b. Country - Select the country for the zip range
c. Zip Lo - Enter the lowest zip code that this zone will encompass
d. Zip Hi - Enter the highest zip code that this zone will encompass. A single zip code would have the same zip entered into both the Lo and Hi column (e.g. 98072 to 98072). - If you need to "skip" some zip codes in a range you will need add additional rows to the zone and build around those.
- Click the Save and Close icon once you've added the appropriate zip codes and/or ranges.

Shipping Zone by State
- To create your Shipping Zone, go to the Setup Module >> Settings Tab >> Click on the Shipping Zones link
- Click the New button to add a Zone
- Complete the provided fields
a. Name - For example Washington, if the rate applies just one state. If you have multiple carriers and want different rates for them we recommend using the carrier title in the Name, such as UPS Zone 2, FedEx Zone 2 etc
b. Region Type - Select Zone by State - Click the Add button to enter the first state
a. Title - Use a unique title - often the state abbreviation
b. Country - Select the country where the state resides
c. State - Select the appropriate state from the drop down - Click the Save and Close icon once you've added the appropriate state or states.

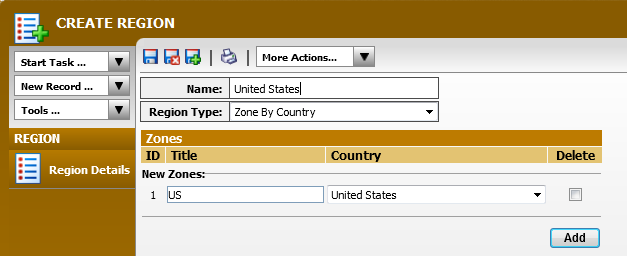
Shipping Zone by Country
- To create your Shipping Zone, go to the Setup Module >> Settings Tab >> Click on the Shipping Zones link
- Click the New button to add a Zone
- Complete the provided fields
a. Name - For example United States, if the rate applies just one country. If you have multiple carriers and want different rates for them we recommend using the carrier title in the Name, such as UPS Zone 2, FedEx Zone 2 etc
b. Region Type - Select Zone by Country - Click the Add button to enter the first country
a. Title - Use a unique title - often the country abbreviation or full name
b. Country - Select the appropriate country from the drop down - Click the Save and Close icon once you've added the appropriate country or countries.
Shipping Services: Once you have setup your carriers and zones, you are ready to create shipping services. Shipping services are your carrier rate tables, for example: UPS – Ground, or FedEx 2Day. When creating a shipping service/rate table, you will give it a title, add the zone the table applies to and enter rates. You can enter multiple zones for each service and enter the rates for that specific zone.
- To create your Shipping Services, go to Setup > Shipping Services and click New.
- Choose the Carrier for this service (e.g. FedEx, UPS, BobsShipping…)
- Enter a Service (name): Type the name of the service you will use. If this is for a web store, your customers will see this field combined with the carrier field when they are shopping. For example, you select the carrier of FedEx and enter Ground as the service. Customers would then see “FedEx Ground” when shopping. If this is not a web store service, you staff will see the carrier/service combination when they are creating shipping orders at the POS or phone/club orders in Director.
- Enter a Service Code, this is a unique code you assign for this service, for example: FXG for FedEx Ground service. Service codes must be unique, for example if you offer both FedEx Ground and UPS Ground services, you cannot use the same code of GROUND for both.
- Enter a Carrier Code, this should be entered as the code the Carrier uses for this service. You can look these up on the carrier website or contact the carrier directly. These codes don’t need to be unique, for example you might enter the same code for UPS Ground and for BobsShipping Ground, if BobsShipping happens to ship using UPS as their provider.
- Enter a Shipping Code: This field is used by ShipCompliant. If you do not use ShipCompliant (typically wineries only), then you can just repeat the carrier code here. If you use ShipCompliant, contact them to determine what their “code” is for the service you are creating.
- Choose “By Weight or by Amount”: You will need to identify if your rate tables are by “weight,” which is typical for almost all carriers or by “amount," which is uncommon. Weight based tables total the weight of all the items in the package (see the weight field in product profile) – Amount based tables look at the order DOLLAR total to determine the correct rate.
- Choose Interpolate option (defaults to No). If you want bLoyal to calculate an “average rate” – then set to Yes. For example, if your rate tables are setup in 5 lb increments (5, 10, 15) and the shipment weights 12 lbs – do you want the system to approximate the rate using the 10 and 15 lb prices OR just charge the 15lb rate? Set to no to simply charge the higher rate.
- Set Priority: This controls the order in which the service displays (online or to staff).
- Check if services is available for customers to select on your web store?
- Check if this service is available for inter store transfers. This is an advanced feature for internal shipping between stores – it does not pertain to the web store. Reach out to our support team for additional direction on using this option.
- Below in Rate Schedules click NEW and then select the region you are building a table for.
- In the UP TO VALUE field you must enter either the “weight” or the amount. Again, weight is more common. For example, up to 1.01 lbs. would be used for a 1lb shipping charge. Be sure to add the “.01” on the end, since if you simply entered 1 into this field, bLoyal would interpret this to mean a shipment of 0 to .99 lbs. To add a 2 lb charge, click the ADD button and then type 2.01 into the UP TO VALUE field. Enter the actual shipping charge into the Shipping column and any handling charge into the Surcharge column (such as charges to cover residential delivery, adult signature, packaging etc.)
Click here to find out more creating a shipping service rate import.
Attaching the Services to your Inventory Location(s): Once you have created your shipping tables, go into the Setup Module > Inventory Locations and make sure the services you want are assigned to each of your “inventory/fulfillment locations” – for example, a store and a warehouse might have different services available to them. By default new services are available for all inventory locations, so if you only want the service available at some you will need to remove it by clearing the check box in those inventory locations.
Comments
0 comments
Article is closed for comments.