This article covers how to create a subscriber group and add members to it.
Click here to learn about Subscriber Group Membership Codes and how to use them (please note: this does not apply to the bLoyal Core Edition).
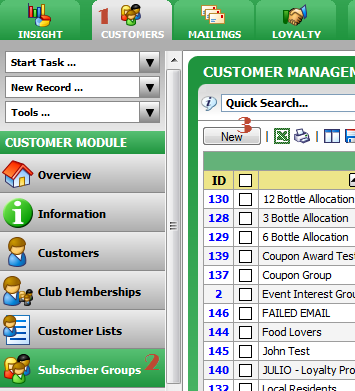
- Click on the Customers Module
- Click on the Subscriber Groups tab
- Click the New button
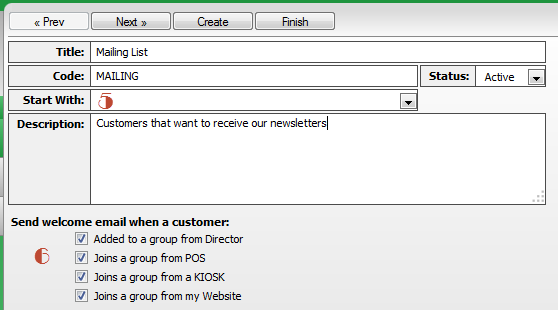
- Add a Title, Code, and Description. The code must be unique among any other subscriber groups that you may have. The code is for data integrity purposes.
- Optional: Choose a list of customers to add to the group from the Start With drop down box if you'd like. Start with allows you to start your group with Members of your other existing Lists, Subscriber Groups, Membership Programs or Clubs.
- If you'd like to send a welcome email to customers when they join the subscriber group check the box next to the applicable options. For example if you want to send a welcome email only if staff joins them to the group from Director, check the box next to Added to a group from Director. If you check any of these boxes be sure to create a welcome email for the subscriber group. We recommend that you create the welcome email first, then once you're happy with it come back and check the boxes as appropriate to ensure a quality email is sent versus one you're still working on.
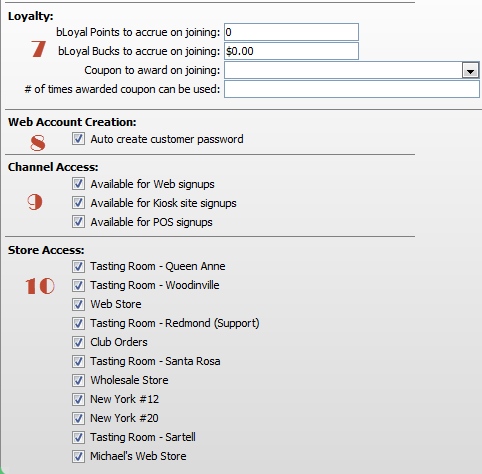
- Enter amounts in the Loyalty area if you'd like to award points or dollars when a customer joins the group.
- If you'd like to automatically have a password created for the customer when they join the group check the Auto create customer password box. If you use this option we recommend that you send a welcome email letting customers know you've set a password for them.
- Decide where customers can join the group from by checking the appropriate boxes.
- Decide which store(s) provide access for a customer to join from by checking the appropriate boxes.
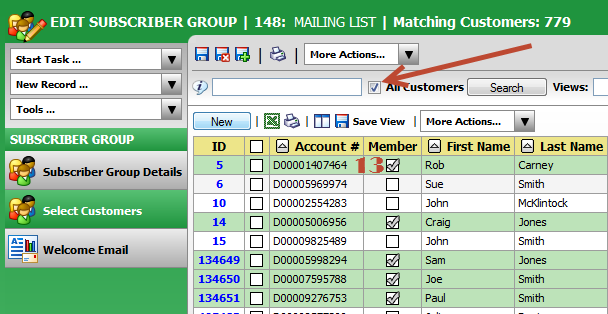
- Click Next or select the Step 2 Select Customers tab.
- Enter any search criteria and click Search. When first adding customers to a group you will want to have the All Customers box checked so that you can
-
Click the Member check box of any customer(s) you wish to add to the group and click Save. Repeat searches as necessary for additional customers, checking the member box and Save button each time as needed.
- Click the Next button if you would like to add a welcome email. Click the Finish button if you do not want to add a welcome email.
Other Ways to Add Customers to a Group - You can also add customers to a group by using the More Actions drop down in various areas of Director such as the Customers tab and the orders tab.
- If you have a large number of customers to add to your group you can utilize a data import found in the Tools Module.
Creating the Welcome Email
-
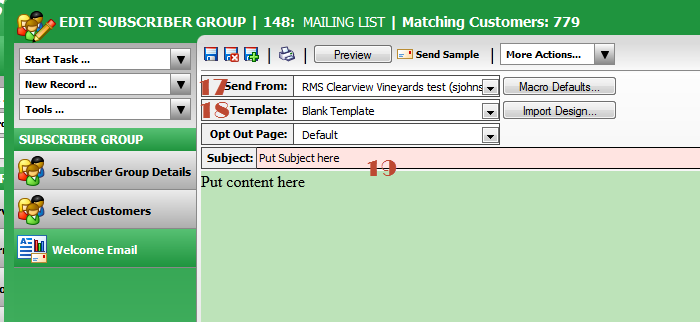
Select the email address you want the welcome email to come from.
-
Select a template from the drop down list or you can import your own html as may be appropriate.
-
You will also want to add a subject and body to your email. You can utilize the standard email options such as macros and more as documented in the Mailings section of the Support Center forums.
-
Click the Save button once you're happy with your email. You can also send yourself a sample to see what the email looks like.
Comments
0 comments
Article is closed for comments.